
Graphics baseline and repeatable tuning
Gothic 1 Remake Best Settings for FPS and Visual Quality
The safest Gothic 1 Remake best settings are a measured starting point, not a universal preset. Begin with the clean game, record one repeatable scene, then change the option most likely to limit your PC. This guide gives you a balanced baseline, explains the main trade-offs, and shows when to keep or roll back a change.
Reviewed October 8, 2026 · Official Steam requirements checked
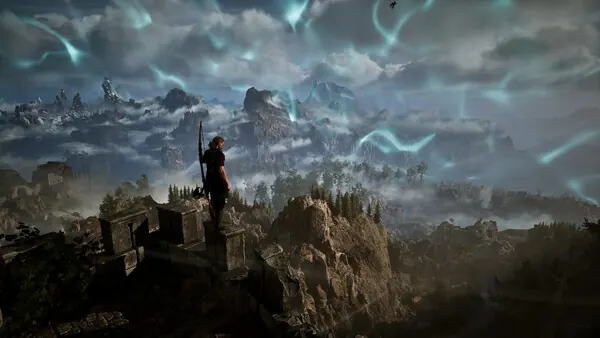
Gothic 1 Remake best settings: start with a balanced baseline
Before changing a slider, launch the clean game and choose a route that represents how you actually play: an exterior with distance, an interior with lighting, and a busy area with characters or combat. The official Steam page is useful for the base PC requirements, but those requirements do not promise one fixed frame rate on every system.
Use your monitor resolution as the first reference point. If the GPU has spare headroom, keep the native output and tune individual effects. If the GPU is saturated, use a moderate upscaling option before destroying shadow, foliage, and texture quality. Write down resolution, upscaling, preset, frame cap, average FPS, visible stutter, and the exact test location so a later result has context.
A balanced starting profile usually keeps textures at a level your VRAM can sustain, keeps view distance high enough to preserve the world, and reduces one expensive effect before reducing everything. Do not copy a preset designed for a different graphics card. The useful question is not which profile looks most aggressive, but which smallest change removes your measured bottleneck.
- Test without Mods, ReShade, overlays, or capture tools first.
- Use the same save, route, weather, resolution, and frame cap for comparisons.
- Keep the original configuration and record every changed option.
- Separate shader-compilation stutter from repeatable traversal stutter.
Tune graphics settings by bottleneck, not by the biggest FPS claim
Lowering every option at once makes it impossible to know what helped. Use the table as an order of investigation rather than a promise of a specific result. The same setting can behave differently at 1080p, 1440p, and 4K because resolution changes how much work the GPU must complete.
If the GPU is close to full utilization and frame time improves when output resolution falls, test resolution or upscaling first. If GPU utilization is low while frame pacing remains poor, a visual preset may be the wrong fix; inspect CPU load, background work, storage, drivers, and the Mod state instead.
Textures are a special case. Lowering them can reduce VRAM pressure and streaming stutter, but it can also make the world look soft without fixing a CPU limit. Shadows, volumetrics, reflections, and foliage can be better first targets when the problem is GPU frame time.
Use the performance Mod guide only after the clean settings baseline is understood. A configuration package may change several options together, so it should be measured like a new experiment rather than treated as a guaranteed upgrade.
| Setting group | Safe first test | What it may improve | Main trade-off |
|---|---|---|---|
| Resolution / upscaling | Keep output resolution; test moderate upscaling if GPU-bound | GPU frame time | Blur, shimmer, or softer edges |
| Shadows / foliage | Reduce one quality step | Busy outdoor scenes | Less depth, detail, or shadow stability |
| Volumetrics / post-processing | Lower the expensive effect before the whole preset | Fog, lighting, and effect cost | Atmosphere and clarity |
| Textures / streaming | Keep high until VRAM pressure is observed | Streaming stutter or VRAM spikes | Soft surfaces and late detail |
| Frame cap / V-Sync | Cap below a stable repeatable ceiling | Frame pacing and heat | Lower peak FPS or added latency |
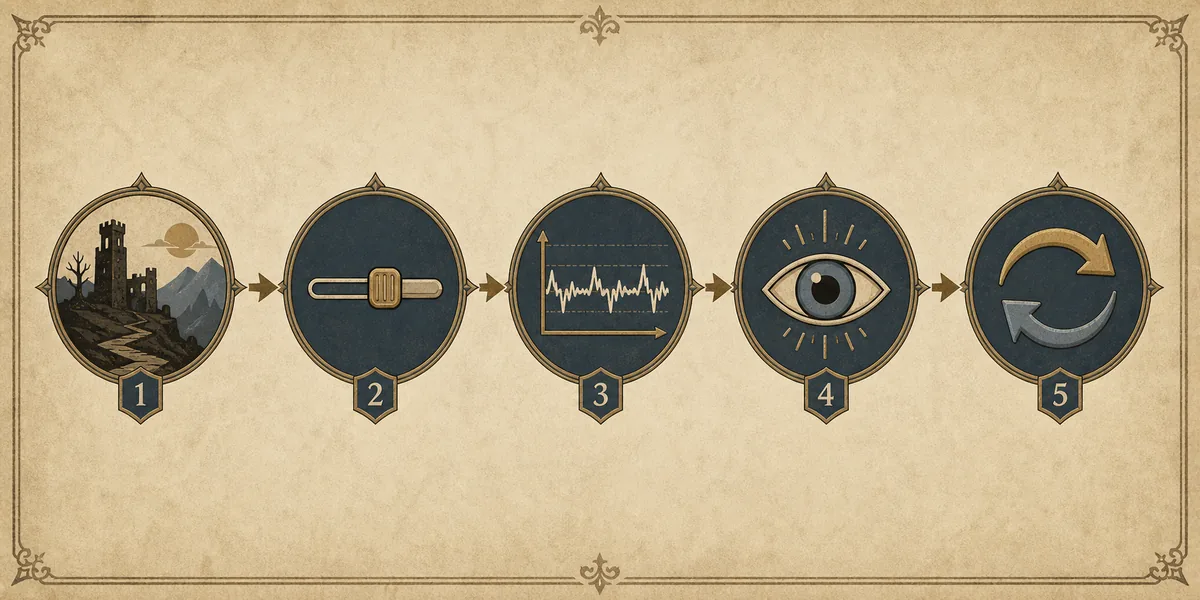
Use a five-step test before keeping a preset
A short peak-FPS reading is easy to misinterpret. Let loading and shader compilation settle, repeat the same route, and compare frame pacing as well as the average. If two runs disagree, do not force a conclusion; collect another run and note what changed.
The sequence below also makes a future Mod report more useful. When you later visit an author page, you can describe the game build, driver, resolution, active settings, test scene, and rollback result instead of saying only that the game felt faster or worse.
- 1Capture the clean baseline
Disable Mods and overlays, verify the game files if needed, load a copied save, and record the same route.
- 2Change one setting group
Choose the option that matches the measured CPU, GPU, VRAM, or frame-pacing bottleneck.
- 3Repeat after the scene settles
Restart when required, allow shaders or streaming to settle, and run the same camera path again.
- 4Check the image as well as the counter
Inspect distant geometry, foliage, interiors, water, shadows, readability, and input feel.
- 5Keep or roll back
Keep the change only when the gain is repeatable and the visual or stability cost is acceptable.
Choose a starting profile for your hardware headroom
There is no honest universal low, medium, or high profile without knowing the display resolution, GPU, CPU, VRAM, storage, and target frame rate. The profiles below are decision aids. Start with the least destructive option, then measure before making a second change.
For a system close to the official baseline, prioritize a stable cap and preserve image quality until a measured GPU or VRAM limit appears. For a system with limited headroom, reduce expensive effects in a controlled order and keep a written record so you can restore the last working state.
If the game is already smooth but you want a clearer image, avoid stacking a visual ReShade preset on top of a performance preset until each has been tested alone. The extra shader cost can hide the benefit of a lower-cost graphics profile.
| Situation | Start here | Then test | Do not assume |
|---|---|---|---|
| GPU-bound | Moderate upscaling or one expensive effect | Shadows, volumetrics, reflections | Every low preset is better |
| VRAM-bound | Textures or streaming pressure | Texture quality and background apps | Lower resolution fixes texture streaming |
| CPU-bound | Frame cap and CPU-heavy scene checks | Crowd, distance, background work | A visual Mod can fix CPU frame time |
| Stable but visually poor | Restore one step and compare clarity | ReShade or lighting alone | Higher peak FPS equals better play |
| Stutter after Mods | Return to a clean profile | Dependencies, paths, and deployment | Graphics settings repair a broken install |
Test ReShade and visual Mods as separate variables
A sharper or moodier image can feel like a performance improvement even when frame time is unchanged. Test a ReShade or lighting package after the clean settings profile is stable, and compare day, night, interiors, combat, and distant geometry. A useful visual Mod should explain its requirements, install method, and rollback path.
Keep visual changes separate from a performance preset when possible. If both are enabled at once, you cannot tell whether a stutter came from post-processing, a loader, a conflict, or the underlying game settings. Use a copied save and keep manual files outside the test profile when the package requires them.
The best Mods guide can help decide whether a visual change belongs in a small starter setup. If an image change makes dark areas harder to read, creates distracting shimmer, or removes detail that helps navigation, roll it back even if the color grading looks attractive.

Ultrawide displays and controller changes need their own test
For an ultrawide display, keep the native aspect ratio as the reference and check menus, subtitles, map edges, and cutscenes before chasing extra width. If a controller remap or overlay changes the way you read frame pacing, test it after the clean graphics profile so input software is not confused with a GPU limit.
- Test 16:9 and ultrawide menus separately; a clear game scene does not prove every UI state is correct.
- Plug in the controller before recording the baseline and keep the same input layout for each comparison.
When best settings will not fix stutter or crashes
If the clean game is stable but every Mod profile fails, changing shadows or resolution is unlikely to solve the root cause. Check archive nesting, missing frameworks, duplicated loaders, stale files after an update, Vortex deployment, and conflicts. The Mods-not-working checklist separates one-package failures from problems that affect every profile.
If the unmodded game also crashes, remove Mod variables first, verify the official files, review drivers and system stability, and compare the result with the official requirements. Do not download an unknown executable advertised as a universal booster. A source page, documented requirements, and an inspectable rollback path are more useful than a large FPS promise.
When an experimental configuration works, preserve it as a named profile with the game build, driver, settings, Mod versions, source links, and test result. After a game patch, repeat the clean baseline before restoring old files. This prevents an old workaround from being mistaken for the current Gothic 1 Remake best settings.
- Back up saves and the original configuration before testing.
- Use the current author instructions for a Mod or loader instead of an old cached guide.
- Change one layer at a time: game settings, visual injector, framework, then content Mod.
- Roll back the smallest recent change when behavior worsens.
Gothic 1 Remake Best Settings FAQ
What are the best settings for Gothic 1 Remake?
Start with native output or moderate upscaling, preserve textures until VRAM pressure appears, lower one expensive effect when the GPU is the bottleneck, and use a stable frame cap. Test the same scene before keeping the change.
Should I lower textures first to improve FPS?
Not usually. Lower textures when VRAM pressure or streaming stutter is visible. If the GPU is the limit, shadows, volumetrics, reflections, or moderate upscaling may be better first tests.
Can a performance Mod fix Gothic 1 Remake crashes?
It may help a resource-specific problem, but dependencies, archive paths, loaders, damaged files, drivers, and conflicts need separate diagnosis. Test the clean game before adding another fix.
Should I combine ReShade with a performance preset?
Test them separately first. ReShade can add shader cost and change visibility, which makes it harder to attribute both performance gains and image-quality regressions.